katie8206

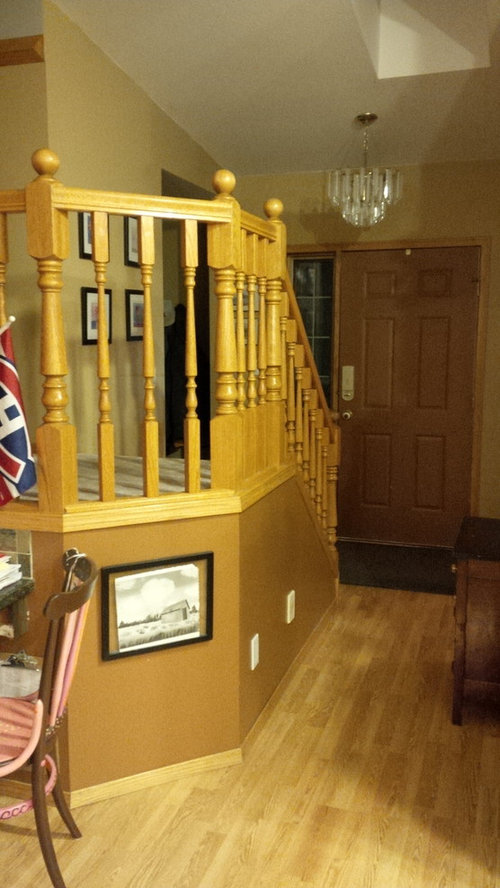
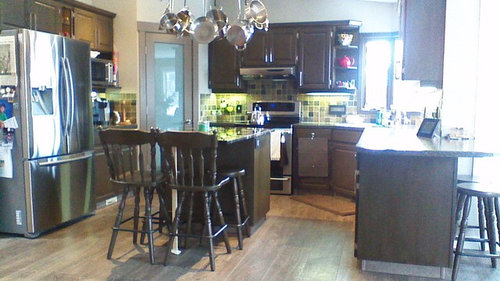
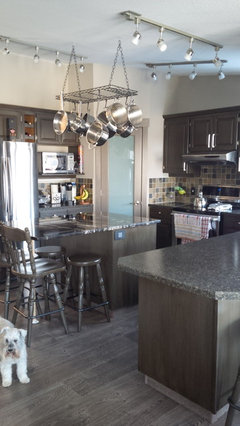
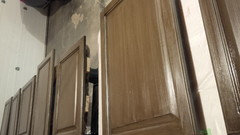
Cheapo Oak kitchen Transformation

Kathy
9 years ago
last modified: 9 years ago
We redid our whole main floor and I love it - especially transformed our out-of-date oak kitchen. Originally we had an estimate to replace all the kitchen cabinets for $20,000. Instead we tried a do-it-yourself product for $200. In addition, we replaced all the cabinet hardware and island countertop but kept the other countertop and the backslash. We replaced all the oak trim and window casing with wide white ones and also replaced all the flooring, doors and light fixtures. Our old-fashioned oak Bannister also had a hefty price tag to replace but instead we refinished the newel posts and replaced the balusters with metal rods. Overall our house looks completely different already. I still have to do the finishing touches of area rugs, drapes, pictures, etc. It's close but not done yet!

Comments (35)

  • kiawenniserathe
    9 years ago
    It's amazing how big a difference a door makes. Awesome job!
    Kathy thanked kiawenniserathe
  • hatetoshop
    9 years ago
    This looks great.
    Kathy thanked hatetoshop
  • PRO
    Interior Affairs -- Vickie Daeley
    9 years ago
    Good for you!! It does look very nice!
    Kathy thanked Interior Affairs -- Vickie Daeley
  • Kathy
    Original Author
    9 years ago
    I used Rust-Oleum cabinet transformations. I was amazed how well they turned out. The wood grain shows through so it doesn't look 'painted' at all. The different steps make them look like they have depth - not just flat paint. Although it was lots of work, it was definitely worth it. Especially for the price. And I ended up using the product on all the kitchen stools, bench, fireplace surround, Bannister, desk, window sills and trims, etc. It worked great everywhere.
  • clutteredval
    9 years ago
    Looks great. Congrats! How did you do the kitchen cabinets? Much prep?
    Kathy thanked clutteredval
  • Kathy
    Original Author
    9 years ago
    The kit comes with a 'de-glosser' that you scrub the cabinets with. It comes with the sponge pad for the scrubbing to. So each door (front and back) and the cabinets had to be scrubbed. But it wasn't a hard job. So much easier than stripping or sanding. Well worth it.
  • Kathy
    Original Author
    9 years ago
    Then you paint with a base coat (you choose the color when you buy the kit). It took me a couple of coats of the base coat. Then you use a 'glaze' that you brush on and can wipe off to get desired effect. I left all the glaze on as I wanted a darker color. Then the final step is to apply a protectant coat. That's it. Easy to do but time consuming.
  • Rhonda Wolske
    9 years ago
    When you say this is time consuming, how much time would you set aside to complete this task?
  • OldGrayMare
    9 years ago
    YOU win the prize today! just ab-fab job!! what a HUGE transformation from no-hum dated to "now-pow-wow!" EXCELLENT choice of colors....very classy.
    Kathy thanked OldGrayMare
  • Kathy
    Original Author
    9 years ago
    It takes a long span of time because of the many steps and it has to dry in between. I have a lot of cupboards - 20 doors and 10 drawers and it took a span of 3 weeks to complete them all. Obviously not working at it solid but working weekends and evenings. It was worth it though :).
  • clutteredval
    9 years ago
    I also really like the new glass pantry door and new trim. Well chosen!
    Kathy thanked clutteredval
  • grammykath
    9 years ago
    Beautiful job! I just had mine done. Wish I knew about this product before. I paid $4500. Achieved the same results! Yours wins my vote. I have 32 doors, 8 drawers. Anyone have no time, it took 2 days with 2 guys.
    Kathy thanked grammykath
  • Kathy
    Original Author
    9 years ago
    Some more before and after pictures
  • Pool Habit
    9 years ago
    Goes to show you really can do it yourself! Great work!
    Kathy thanked Pool Habit
  • horselover222
    9 years ago
    You did a great job!
    Kathy thanked horselover222
  • zazfuzzroc
    9 years ago
    Love what you did, great colors. The backsplash really stands out now, love the glass door, and new light fixtures, railing looks nice too. Nice work, enjoy! :)
    Kathy thanked zazfuzzroc
  • saralina83
    9 years ago
    Love your colors! I have similar 1987 oak throughout my house that I'm slowly changing. I was planning on painting my cabinets but now I'm going to look into the cabinet transformations. Looks great!
    Kathy thanked saralina83
  • PRO
    Kootenia Homes and Remodeling
    9 years ago

    Makes a great difference - very nice job!

    Kathy thanked Kootenia Homes and Remodeling
  • Susan Davis
    9 years ago

    Amazing! My daughter did the same thing with a Rustoleum refinishing kit. It is time consuming but she and DH did it them selves. Would have gone faster except that her baby came 10 days early. haha. You did a wonderful job.

    Kathy thanked Susan Davis
  • PRO
    The RTA Store
    9 years ago

    What a great transformation! Everything looks beautiful!

  • Dawn Rae
    9 years ago

    wonderful transformation and congrats on the frugal success. I am sure you can find better use for that 20gs. The new door is a big upgrade !

    Kathy thanked Dawn Rae
  • rksjmartin
    9 years ago

    Great job. You've inspired us to perhaps try this rather than replace our cabinets. What color of base coat did you choose? Would you be able to post a close up of the cabinets? Rust-0leum needs to see your photos.

  • Kathy
    Original Author
    9 years ago

    Thanks! I used Castle which is a grey base. But I didn't wipe the optional glaze off, which is brown. So, it has a grey undertone with brown. It really doesn't look at all like the Rust-Oleum samples, they are very grey looking. They have lots to choose from but I would think the darker the color the less you would see the decorative glaze, which I love. It gives it a deeper look so doesn't look like you just painted oak cupboards. Good luck! Note, I will take pictures close up and post soon.

  • texas2me
    9 years ago

    Love the new metal spindles on the staircase. Were they hard to install and where did you fnd them? Replacing the "track house" trim with the more subsstantial moldings really adds a lot. Great redo!!!


    Kathy thanked texas2me
  • texas2me
    9 years ago

    What kind of flooring did you put down? It also looks great

    Kathy thanked texas2me
  • Kathy
    Original Author
    9 years ago

  • Kathy
    Original Author
    9 years ago

    Thanks everyone. Here's a close up of the cupboard doors being redone.

  • Kathy
    Original Author
    9 years ago

    The flooring is a laminate - Balterio Grandeur color is Heritage Oak. It's a really wide and long plank one. I love it! Thanks again.

  • Kathy
    Original Author
    9 years ago

    The spindles were from a local railing shop, also found them at our local lumber yard. They also sell a wooden 'channel' strip to set them in, because the old one will be the wrong size if you remove existing spindles. You cut the railings to size (need metal cutting blade) and stain the channel. It's really quite easy. And quite inexpensive compared to our quote to replace the whole Bannister! Spindle cost varies by length and design, but these were $9/each.

  • PRO
    Lenore Frances Home Interiors
    8 years ago

    Great job!

    Kathy thanked Lenore Frances Home Interiors
  • PRO
    Neu Cabinets
    8 years ago

    Great idea for the stair railings,looks a lot more modern.

  • PRO
    Pacific Coast Custom Design
    8 years ago
    Nice job
  • partim
    8 years ago

    Really love the new look, especially the metal spindles.

  • PRO
    Fratantoni Interior Designers
    8 years ago

    Great transformation!!!

Singapore
Tailor my experience with cookies

Houzz uses cookies and similar technologies to personalise my experience, serve me relevant content, and improve Houzz products and services. By clicking ‘Accept’ I agree to this, as further described in the Houzz Cookie Policy. I can reject non-essential cookies by clicking ‘Manage Preferences’.