How to fix Trex deck fascia warping?
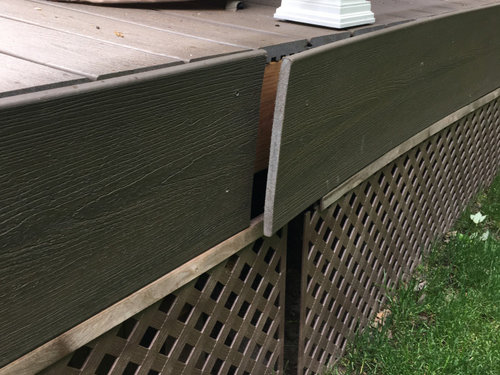
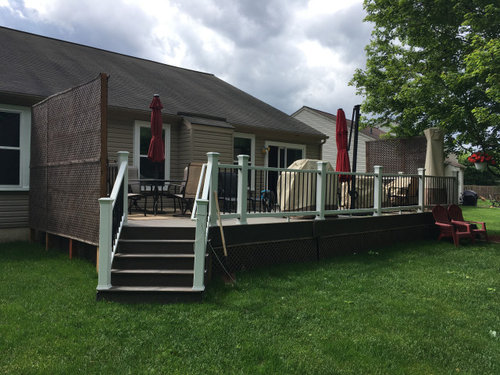
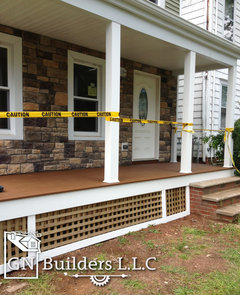
We hired contractors from the Home Depot database and last summer they built us a Trex deck. The deck passed inspection by the city. Later I learned that deck boards need to overhang the fascia otherwise water, snow, leaves , etc will get between and warp the fascia. Well, in nine months that happened to my deck and the fascia is bending, pulling away from the frame, curling and shearing off screws. What are my affordable options?

Comments (12)

GN Builders
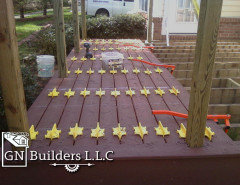
3 years agoA while back Trex introduced its lowest-priced composite decking with scalloped bottom...With that type of Trex decking or any type for that matter, you should always have a border in order to have decking overhang the facia.
Like you learned, the decking should always overhang the facia, if not you be dealing with lots of issues, like in your case, which one of them.
Most contractors or amateurs do it this way because it's faster and easier, but this is how I always did to avoid callbacks and having homeowners dealing with the above-mentioned issues.
Here is a few examples.
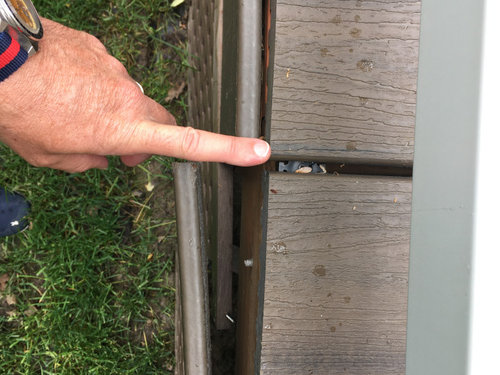
The cheapest way is to add a few more screws and fasten the board back in place.
Good luck

Chad Wiebesick
Original Author3 years agoThank you so much. I will have a professional install some additional fasteners. I tried putting some additional Trex screws myself on one of the boards and it wasn’t able to be straightened because it was still twisted and curled and warped. I’ll hire a pro.
 PRO
PROCounty Deck Services
3 years agouse additional boards to frame the decking in . set the saw depth to trim back existing decking and add secondary support for the framed deck boards. the new decking can overlap the fascia.
 PRO
PROJoseph Corlett, LLC
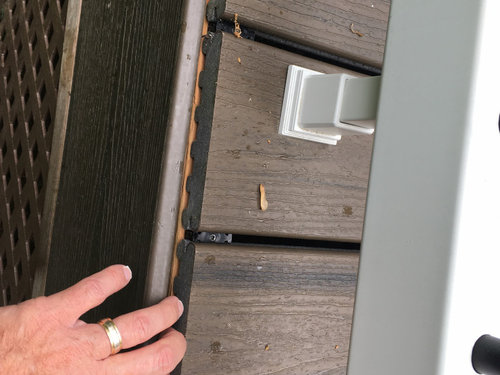
3 years agoThis is a poor detail failure. You could put a fastener every square inch and that Trex is still gonna bow in sunlight. You must accommodate movement, not fight it.
Time for plan "B", not more nails.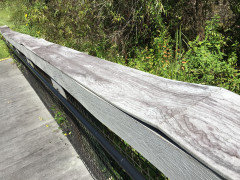

The Red Bug Slough in Sarasota, Florida underwent renovations several years ago and rebuilding the bridges was one of the projects. While one can almost forgive Home Depot hillbillies, this was built to an architect's specifications. An architect who had no knowledge of the limitations and design parameters of his materials. And you thought your detailing was bad. I'm watching my tax dollars self-destruct.
- PRO
Joseph Corlett, LLC
3 years agoChad:
As for a permanent repair, I'd consider removing enough of the deck board ends to install a perpendicular perimeter border. I'd research Trex's specifications as to how far one can cantilever. An overhanging border would not only look much nicer, it would keep weather out of the Trex/framing joint (preserving fastener life) and cast some shadow on the Trex band below. I'd rip the band in two and leave an 1/8" gap or maybe extend the lattice all the way up. 
Michael Meurk
2 years agoTrex recommends a 1/8 gap for expansion and contraction. Picture frame that deck with 1.5" overhang. Remove fascia board ND reinstall with color matching cortex screws. Install from one side to the other. Dont screw end for end because it bows and will cUse all these issues. Hope that helps.

Mike S
last yearI know this is an old post. It does not look like the contractor used any spacers behind the fascia boards. Spacers should be used regardless of whether you overhang the deck or not. See video.
GN Builders