Convert Your Tub Space to a Shower — the Planning Phase
Step 1 in swapping your tub for a sleek new shower: Get all the remodel details down on paper

There are so many examples of large bathrooms, it’s easy to lose sight of the fact that most of us have bathrooms that are about 50 square feet (5 by 10 feet). A dream shower can often become a reality only if it fits into the footprint of a dated tub. But what’s the best way to go about this conversion?
The first step to convert a bathtub to shower is to put everything down on paper. Before you start ripping out tile, bringing home sale items or searching for the perfect grout color, make sure you measure, plan and research.
The first step to convert a bathtub to shower is to put everything down on paper. Before you start ripping out tile, bringing home sale items or searching for the perfect grout color, make sure you measure, plan and research.
Figure out the shower-door swing. Where will you put the door in your new shower so it does not interfere with the toilet or vanity? I like to use a large scrap of drywall to lay out the potential shower-door swing, and then check the distances of the drywall to the toilet and vanity.
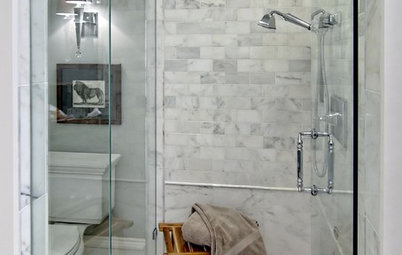
In the renovated bathroom here, a small 1926 tub was replaced with a curbless shower. The walkway from the vanity to the shower was too tight for a swinging shower door, which is why this shower has two glass block walls instead.
Tip: If the bathroom floor is going to get wet outside the shower, select a small tile or another slip-resistant material.
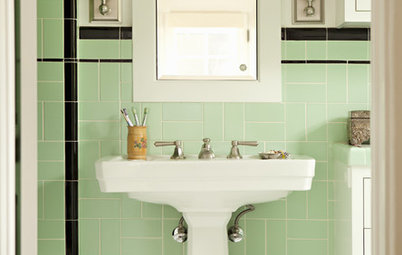
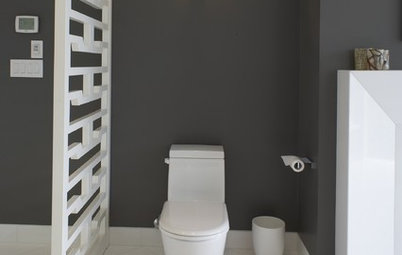
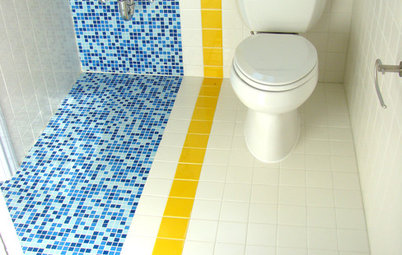
Make sure you'll still have plenty of space. When you replace a tub with a shower, the toilet can start to feel crowded. Make sure you pay attention to this so it feels right to you.
Try to keep at least 15 inches room from the center of the toilet to the new shower glass. If your shower ends up being on the smaller side, you can skimp on this measurement a bit.
Tip: Hold up a sheet of scrap drywall to act as a fake glass panel and sit on a 5-gallon bucket to mimic the toilet's location. This can help you decide how close you like the glass, and how big you'd like your shower.
Stand in the place where your shower will be. A shower depth of 32 inches feels small to me, but might work for you. A depth of 34 to 36 inches tends to be ideal, but again, don't crowd the toilet. Make sure you check your local code for minimum distances, too.
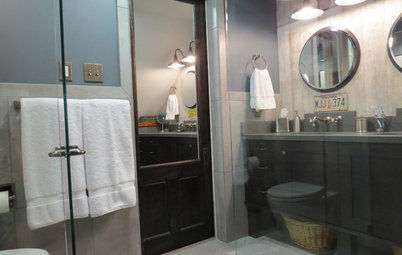
Take out the door if it’s causing problems. Who says you need a door anyway? And look into heated floors if you decide not to have a shower door. Floor heat is very good at keeping the bathroom floor dry in addition to warm.
Tip: If you plan to have a doorless shower, you’ll need to be extra careful when using a handheld shower fixture. A fixed showerhead or rain head (such as the one in this photo) will keep the water inside the new shower.
More tips on working with a doorless shower
Tip: If you plan to have a doorless shower, you’ll need to be extra careful when using a handheld shower fixture. A fixed showerhead or rain head (such as the one in this photo) will keep the water inside the new shower.
More tips on working with a doorless shower
Take your time looking for fixtures. Shopping for fixtures can actually be fun! Research the options and look for specials and possible combos. Don’t feel like you have to use all the same brand — I often use fixtures from two separate companies that still look great together.
Tip: If you’re building a steam shower, consider Dornbracht fixtures. Remember that a steam shower should be constructed by someone with at least five years’ experience in vaporproofing.
Tip: If you’re building a steam shower, consider Dornbracht fixtures. Remember that a steam shower should be constructed by someone with at least five years’ experience in vaporproofing.
Consider your lighting and tile layout from the start. This is key to a polished-looking shower. Make sure to include lights in your shower, not just around it.
Depending on your shower size and makeup, one, two or four lights might look best. When you remove your old tub and tub surround to make room for the new shower, this is a perfect time to check that your light system can be installed like you had planned. Often the ceiling framing above a tub can be easily adjusted to accommodate a lighting plan.
Don't tile without the finished light sources in place. Without a light source in place, it is hard to know how any lippage might look. In a shower the lights are often quite close to the wall, which will show every little flaw in a tile installation.
Tip: Plan your tile layouts early, using the ceiling height as a reference. Try to avoid sliver cuts in tile layouts. Drawing the layout on paper helps — once you have this finalized, you can use your fixed tile grout lines to lay out shampoo niche locations and shower fixtures.
More ways to light up your shower
Decide what additions you'll need. Purpose is key here. How will you use the shower? Do you need a bench? Somewhere to put your shampoo? What about a window? All of these extras are important to the renovation and help narrow down a construction plan.
Tip: If you're building a shower that will include items like benches, windows and shampoo niches, make sure the waterproofing is brought right up the wall and take extra care around the windows. Kerdi Fix is an outstanding product for seaming the window to the shower's waterproofing system.
Next: Step 2 — Choosing your new shower fixtures
More: Houzz guides to remodeling your shower

You will also need to to have a finished ceiling height of 80 inches minimum and a shower that’s at least 30 by 30 inches to comply with the National Kitchen & Bath Association’s guidelines for bathrooms. If you decide to plan for a bench, make sure it doesn’t crowd this space of 30 by 30 inches minimum.
Record the toilet location. A distance of 15 to 18 inches from the the center of the toilet to the glass on the new shower door tends to be comfortable.