From the Pros: 7 Top Tips for Painting Interior Walls
There's a real art to getting the perfect finish on a wall. Find out how the professionals do it before you get too creative

Wall surfaces can be quite unforgiving of the unprepared home renovator. Yet how well your walls and ceilings, and all the other little details, are painted can make or break a room. If you don’t get it just right, it’s a sure bet that everyone will notice all the imperfections.
Sydney-based Master Painter Paul Kowalczuk, who has been perfecting his craft for a couple of decades, says he has been called upon to fix up a few botched DIY jobs over the years. Here’s the problem, he says: “A lot of people think painting’s easy. We make it look easy. But to paint well evolves around getting a smooth finish, and that’s often easier said than done.”
So before you load up your roller with your favourite hue, take onboard these few words of advice from the people in the know…
2. Get your roller technique down pat
“The key to making it look good is getting rid of the roller marks,” explains Kowalczuk. “Let the roller do the work because that’s what it’s designed to do: use gravity.” So, in this case, the less exertion the better – if you push, the paint will just come out of the edges of the roller and create havoc on your path to smoothness.
“The key to making it look good is getting rid of the roller marks,” explains Kowalczuk. “Let the roller do the work because that’s what it’s designed to do: use gravity.” So, in this case, the less exertion the better – if you push, the paint will just come out of the edges of the roller and create havoc on your path to smoothness.
3. Take your time with dark colours
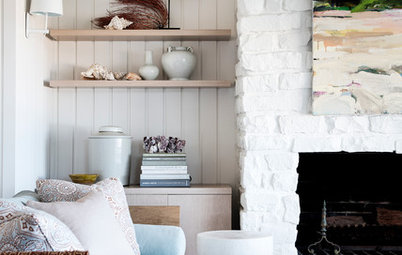
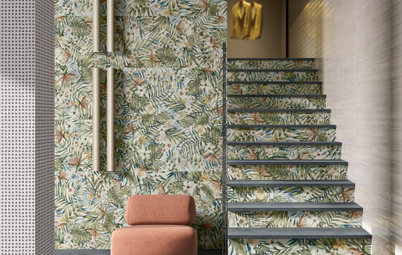
It’s more difficult to achieve a perfect finish with dark colours. If you look at a wall from different angles it reflects light differently. “That’s what we call ‘glancing light’; you can see imperfections in the surface,” explains Paul. “They don’t stand out quite so much on lighter surfaces, but on darks this inflates by three or four times. The darker the colour is, the harder it is to get it to look even.”
It’s more difficult to achieve a perfect finish with dark colours. If you look at a wall from different angles it reflects light differently. “That’s what we call ‘glancing light’; you can see imperfections in the surface,” explains Paul. “They don’t stand out quite so much on lighter surfaces, but on darks this inflates by three or four times. The darker the colour is, the harder it is to get it to look even.”
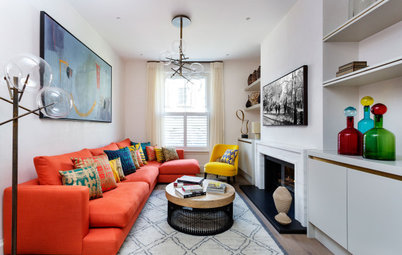
4. Work with your floor colour
Gold Coast interior designer Sandy Cousens has often pitched in and painted interiors to achieve the look she’s after. She says one of the most common errors people make in choosing a paint colour is not taking into account the way wall colours will look against the colour of their floor. “Terracotta can bring out the peach in a white,” she explains.
Cousens suggests always painting chosen samples from paint colour charts in the corners of rooms to see how they look in the shadows and alongside the floors before going full steam ahead with painting the entire room.
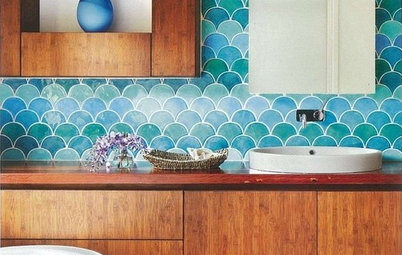
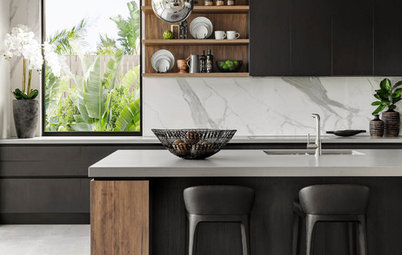
5. Go low-sheen or matt in bathrooms
Considering the anti-mould properties of paints used in wet areas is a must, especially if your bathroom isn’t well-ventilated. And while higher gloss paints are the norm for bathrooms, given their durability and ease of cleaning, Cousens sees them as an “aesthetic no-no”, believing the matt look is a little more Hamptons sophisticated.
Considering the anti-mould properties of paints used in wet areas is a must, especially if your bathroom isn’t well-ventilated. And while higher gloss paints are the norm for bathrooms, given their durability and ease of cleaning, Cousens sees them as an “aesthetic no-no”, believing the matt look is a little more Hamptons sophisticated.
6. Use no-VOC or low-VOC paints
Most paints contain petroleum-based solvents or Volatile Organic Compounds (VOC’s), but there are some brands who also produce paints without them. Cousens, who previously ran a business painting murals in children’s bedrooms, is an advocate of health-conscious interior decorating. Let’s not forget that a lot of people get an urge to paint rooms when they are expecting a baby. So using a paint that is no- or low- VOC can not only help the environment, it can also benefit your family by decreasing asthmatic reactions and allergic sensitisations.
Most paints contain petroleum-based solvents or Volatile Organic Compounds (VOC’s), but there are some brands who also produce paints without them. Cousens, who previously ran a business painting murals in children’s bedrooms, is an advocate of health-conscious interior decorating. Let’s not forget that a lot of people get an urge to paint rooms when they are expecting a baby. So using a paint that is no- or low- VOC can not only help the environment, it can also benefit your family by decreasing asthmatic reactions and allergic sensitisations.
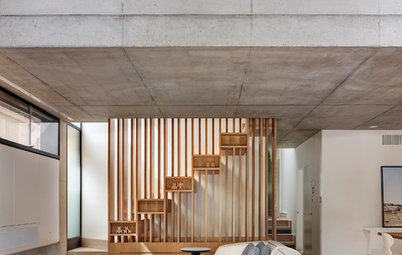
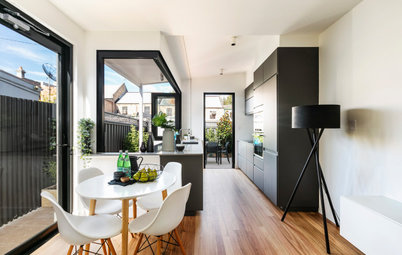
7. Ceilings come first
It’s probably common knowledge that you should paint the ceiling first, but Kowalczuk says many people in a rush to get the job done err by not completing all coats on the ceiling first. “Let the ceiling undercoat dry, then do both coats of paint on the ceiling before moving down into the room,” he says. “Next take on all of the other elements, such as the windows, architraves and skirtings, before moving on to the walls. That way you don’t have to keep cutting back in at the edges. Feature walls come last.”
TELL US
We’d like to know if you have any painting tips to share. And have you learned from any painting mistakes? Let us know in the comments section below.


Rushing is not a good idea. Doing a good job on a wall surface is all about preparation and taking a systematic approach. Kowalczuk says thinking ahead helps. If you plan to paint on a weekend, then get the gap-filling, sanding-back and washing-down out of the way on Friday afternoon. And don’t expect the whole room to be complete by Sunday night.